Kat’s Pre-Toolbox : Substance Painter

I’ve been having a play with a package called Substance Painter from Allegorithmic.

For a little while I’ve been looking at some of the texture creation packages that have come along recently – if you’re into 3D stuff you’ve probably taken a look at Quixel’s suite of tools. I must admit those look pretty good and the whole suite is certainly cheaper than Substance Painter. The wrinkle is that Quixel all runs as a Photoshop plugin, and I don’t use Photoshop (I know I’ve mentioned Photoshop in my past posts but I was using it in its “placeholder” role for another graphics editor – everyone knows what Photoshop does). This means the price for the Quixel suite is Photoshop + Quixel, which really starts to add up.

Substance Painter is $149 for an indie license, which doesn’t stack up too badly against Quixel.

Substance Painter is a combination 3D painting app combined with some powerful procedural texture generation that mixes up inputs like curvature, ambient occlusion and normals to create weathered metal, chipped paint and realistically used looking surfaces. It’s designed to produce content for current-gen PBR (Physically Based Rendering) game engines like CryTek and Unity5 but it can produce effective textures for SL as well, though you do have to jump through a few hoops.

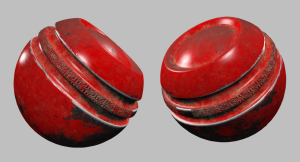
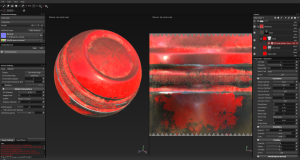
SubstPainter_Native

In the picture above the complex “distressed” surface has been created almost entirely by dragging and dropping the so-called “Smart Materials” into the layer stack and then just having a little fiddle with the settings. As you can see the curvature of the mesh affects the texture, showing the paint rubbing off around the sharper edges.

The application also allows you to paint directly onto the surface, which isn’t anything new in itself, but Surface Painter’s brushes can include multiple channels that affect the surface colour, glossiness, bump and “metalness” at the same time.

Making it work with SL

So, how does it translate into SL?

SubstPainter_SL

As you can see from the above image, not too badly. SL’s rendering of metals isn’t great but it works well enough.

Surface Painter is designed around a very different texturing workflow than SL – there’s every chance that the “Next Generation Platform” will use something more like a current-gen PBR renderer, but we won’t know for a while. Because of this its default maps that it generates are things like “Roughness” and “Metalness” – not what you need for SL at all.

All is not lost, however. The application supports different export settings that are optimised for different game engines. You can also design your own, allowing you to put together one that produces exactly what you want for SL. The options available for output include derived maps like Specular and Glossiness – now we’re cooking with SL gas!

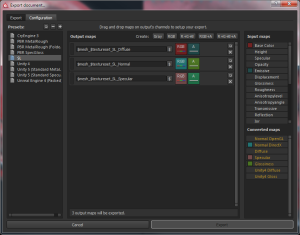
You can put together an export configuration that will automatically build perfect textures for SL – Diffuse with Emissive in the alpha channel; Normals with Glossiness in the alpha channel and Specular with Metallic in the alpha layer for Environmental Intensity.

SubstPainter_ExportConfig

Once configured like this Substance Painter can output three maps ready for immediate upload to SL.


I haven’t actually forked over my hard-earned cash for Substance Painter yet – I’m still only a few days into the demo – but it’s a fun and powerful tool to play with and I may well end up buying it. Time will tell.

Conrad Props Download

As I mentioned before I wanted to make as much of the USCSS Conrad build as possible available for others to use. I’ve trawled through all the bits and pieces and pulled out everything I think is re-usable outside the build.

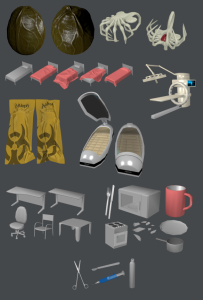
I’ve put together a zip file of 39 upload-ready meshes along with associated assets like normal maps and textures.

!PreviewAll

All these are released under a CC BY 4.0 license, so feel free to use them for anything you like so long as you give me some credit 🙂

Download here : http://sta.sh/01j5da2qutdq

Long absence and a USCSS Conrad Post-mortem

It’s been a while since I updated this blog and I haven’t been in SL much either. A combination of things have been keeping me away – relatives in and out of hospital and some personal issues that kept me away.

It’s not all done with yet, and I may still not be back on a regular basis for a while, but I hope things are tending more towards the calm now, so fingers crossed.


The last thing I was working on was the USCSS Conrad build. It was a fun project but as it grew it became very clear that a build like this needs to be quite meticulously planned in advance rather than just thrown together in an extended manic episode. I may make a better planned attempt at it later but for now it’s a question of picking over the things I’ve learned and hoping you can learn something from them too 😉

Part of the reason I began building the Conrad was to have a bit of a play with SL’s Advanced Lighting Model. I wanted to explore what could be done with projector lights, scripted lighting and a few other things.


Setting the environment

Controlling environmental light in SL isn’t an easy thing – everyone can set their lighting settings to whatever they like, but I wanted the Conrad to be dark and to only have the light that I wanted in there.

The solution I was running with in the end used a small HUD that used RLV to set the user’s environment to a completely blacked out one and prevent them from selecting another while they were inside the build. Access to the Conrad would be by donning the HUD and being teleported to the entrance.

This allowed me, for RLV users anyway, to control the environment and trap the players in the darkness – something I felt was important. If they could turn the lights on at any time it’d lose a lot of impact. There would have been a “bailout” option that would teleport the player out of the build and release the environmental controls.

To give the players some control they would have been given a torch. I played around with this in a number of ways and eventually settled on a two part torch solution. There would be a simple prop torch that the avatar would hold in their hand and an invisible prim that attached to the avatar’s eyeball that would actually project the light into the scene. This allowed the torchlight to follow the avatar’s gaze in mouselook or to follow the movements of their mouse when in third person view.

Conrad Torch

Scripted Lighting

There’s a scene in Alien where Dallas visits Mother, the ship’s main computer. As he enters the computer core the fluorescent lights come on, flickering then stabilising, with that characteristic ticking noise. I always liked that look of the environment blinking into life around the character.

The very first part of the Conrad that I built was a corridor with a door at one end. When you clicked on the door to open it the lights in the corridor would flicker on, illuminating the previously dark corridor. I thought it made a good introduction to the scene.

Conrad Main Door

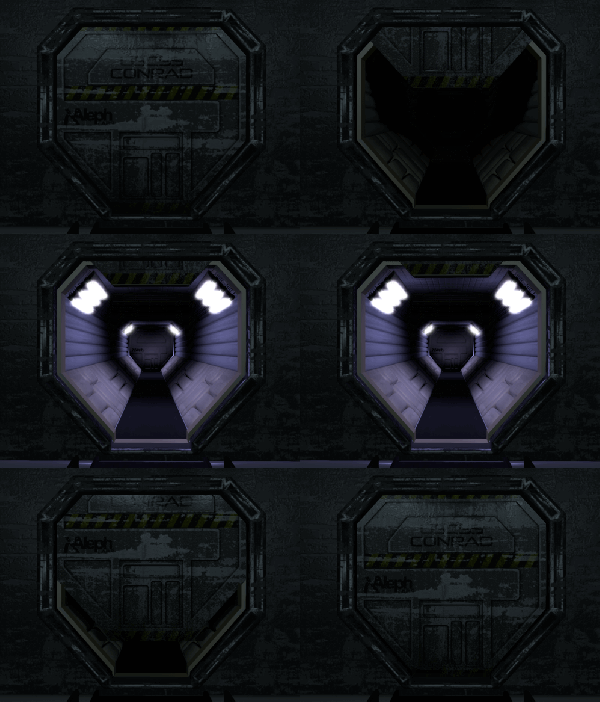
The lighting clusters are scripted to listen for a message from the door saying that it’s either opening or closing. When they receive this message they enter a randomly timed sequence of flickering on and off before settling. The script affects the projector light component, the “full bright” and glow settings of the fluorescent tubes. The projector texture is one I made in Lightwave depicting the light cast from a similar lighting assembly – it’s mentioned in a previous post.

There’s various other scripted lighting events around the Conrad build that add some reactivity to the environment, but they mostly follow a similar scheme to the one above.

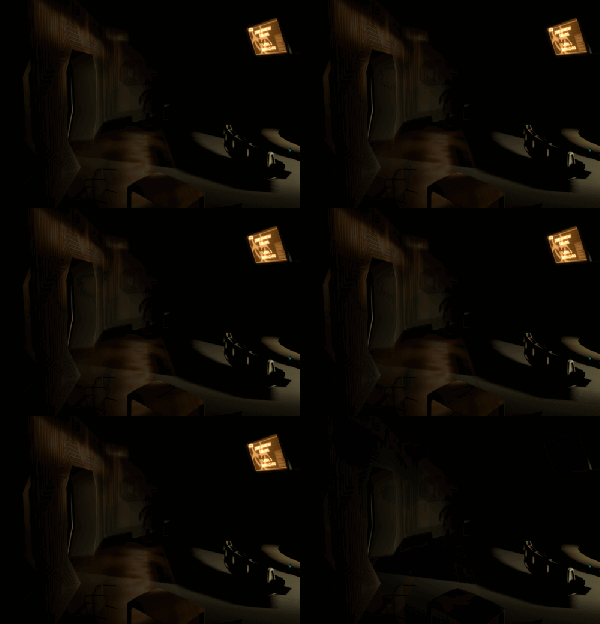
One that doesn’t is in the main lounge area. The lighting here is completely dark except for some light cast into the scene from four screens set up near the ceiling. One of the screens is broken and dark, two display information about the ship’s condition and one is flickering.

CONRAD Lounge

This screen is scripted on a loop to just flicker on and off endlessly. The picture is warning about a biohazard alert and projecting its flashing light onto the door that leads the player down into the lower decks. I was trying to use this to begin to set a gradually more dangerous feel as the player moves down through the ship.

Animated Lighting

In a previous post I talked about making the classic cliche light-shining-through-a-fan. I covered that pretty thoroughly there, but I figured that while I was making animated GIFs I ought to toss one of that in here.

Conrad Cargo Bay


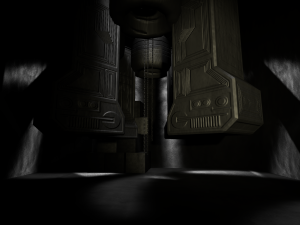
So, where now for the Conrad? I’m probably going to tear it down, strip out the useful and re-usable scripts, make some notes on my mistakes (of which there are many), and wait for the mood to take me with another idea where I can use these techniques. I’m going to try to package up as many of the props and textures as I can and distribute those for free so anyone can use them in their builds – watch this space.

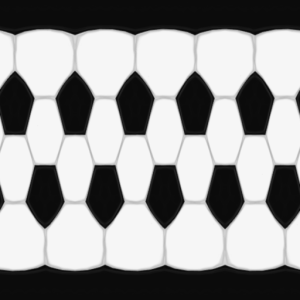
Freebies : Football textures

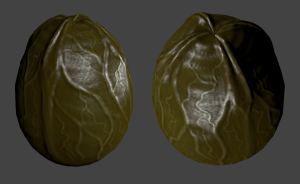
This was a prop I made for the Conrad build but unlike most of the other things I’ve made it’s just textures that can be applied to a standard SL spherical prim.

Football1_001

When applied to a sphere prim you’ll need to rotate the textures 90 degrees in the texture panel. For some reason SL places the pole at the side of the texture.

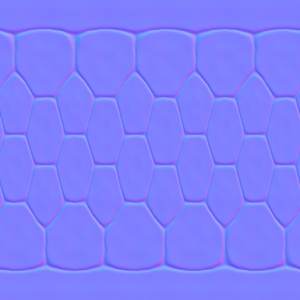
The basic textures are the diffuse and normals:

Football diffuse

Football diffuse

Football Normals

Football Normals

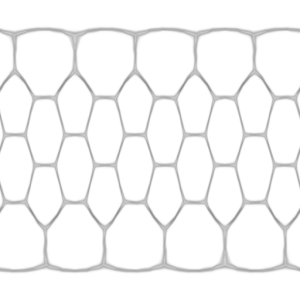
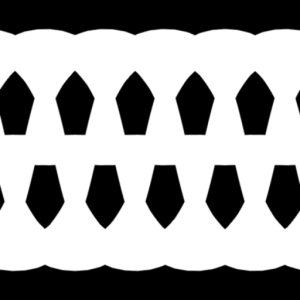
I’m also going to include the ambient occlusion layer and the pattern blocking texture so you can mix up your own textures yourself:

Ambient occlusion

Ambient occlusion

Pattern blocking

Pattern blocking

Feel free to use these textures for whatever you like so long as you include a link back to this blog with anything you distribute.

USCSS Conrad 10 : The lower decks

The build for the upper deck of the Conrad is mostly done now – I’m letting it sit for a time while I work on how the story will flow through it. I’ve reconfigured it a little and I’ve had to abandon some areas due to land impact issues – when I’ve finished the build I may come back and fill in what I’ve left out if there’s any room.

For the building work I’ve moved on to the lower deck. The lighting effects are going to be stronger and more animated down there – the upper deck should introduce the players to the way the Conrad uses light without overwhelming them; the lower deck turns it up to eleven.

I’ve been working on various props and effects and some fairly cool looking sets are beginning to come together.

One of the things I definitely wanted to have was dangling chains for the industrial-looking parts of the build. This presented a couple of challenges.

Chains are hideously complex shapes that just eat polygons like mad. Even games like Skyrim resort to using a pre-rendered texture on a single flat poly in places. With a bit of poly-bashing in Lightwave I managed to come up with a satisfactory looking chain that will give me about 120 links for an LI of only two – I’m still fiddling with this and may be able to get it down further with a little luck. In any case it’s enough right now to give me a 10m chain that looks heavy without being too oversized.

The second problem was that the chains need to move. Just hanging still really did nothing for the scene. I fiddled with scripts for quite a while and eventually ended up with a system that used llSetKeyframedMotion to add a gentle swaying to them. Several copies of this, moved to slightly different levels and angles, produced a really nice little cluster of subtle motion.

Prior to tackling the Conrad I’d never used llSetKeyframedMotion before so it’s been a little bit of a learning curve but it’s turning out to be a fantastically useful tool.

Conrad Lower Decks

In the picture above you can see the chains in place in a roughed-out industrial build. What I can’t show you on this blog is the animated lighting in that set (well, not until I get a proper vidcap solution sorted out, but that’s way down my list of priorities at the moment – you’ll just have to wait and see it in-world!). I’ve gone with the old cliche of having light shining into the scene through a ventilation duct with a fan in it. I’ve never understood why anyone would mount a light above a fan like that but I can’t argue with the atmospheric effect it produces.

It took some experimenting to get this effect to look right, though. The obvious solution, and my first attempt at it, was to have a simple light projector shining down from above a mesh fan. This sort of worked but the SL rendering engine is picky about what shadows it renders – if the shadow-casting object is too far away it gets culled from the shadow mapping and all the effects disappear. With the fans mounted on a high ceiling the effect of their shadows rarely made it to the ground.

What I eventually ended up with was a (fairly crude) mesh fan that projected its own shadow map into the scene.

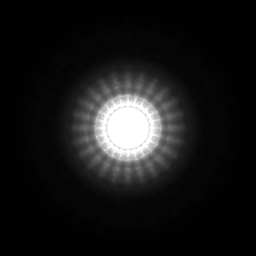
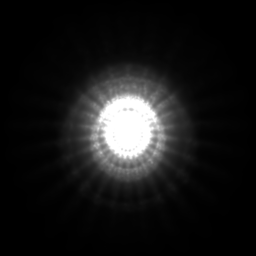
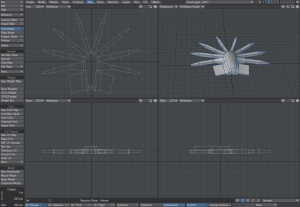
Mesh objects can act as projector lights as well as prims. They will project light along what Lightwave labels as the +Z axis and Blender labels as the +Y axis. This makes it fairly easy to construct a mesh fan that will be able to project a light from its face and a projection texture that will reflect the effect of a light shining from behind the fan.

FanBlades2

Projection texture for the fan

SL is much more reliable when dealing with light projectors – there’s no awkward culling; they project their light over their configured range reliably.

Add this to a small mesh duct that places a poly behind the fan that I can assign a white fullbright texture to with a little glow and you get a convincing effect of light shining into the scene through a fan.

Each fan has a small script that uses llTargetOmega to set them spinning – the projected light spins with the prim that’s projecting it – and the effect is complete.

This technique adds reliable dynamic lighting to a 14m high room – no problems with shadow culling. The effect seen in-world is great, especially when interacting with normal- and specular-mapped objects.

I’d like to add some volumetric lighting effects to this as well but I’m still working on that and I suspect that I won’t be able to make it work effectively in any case. Still, I’m happy enough with what I have so far 🙂

USCSS Conrad 8 : More building and lighting

Despite the lack of updates the work continues on the Conrad. Over the past few days I’ve been polishing off a lot of the scripts and builds that were just roughed in. Now all the doors work, trigger the correct lights; the cargo lift is functioning and the ambient sound effects system is coming along nicely.

The sound in particular is very important to the atmosphere. Despite my familiarity with the build I’ve actually got properly creeped out a couple of times doing a walkthrough with the lights out and the sounds on.

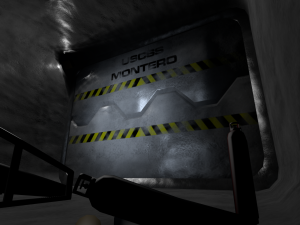
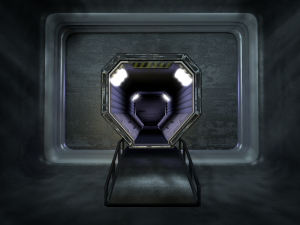
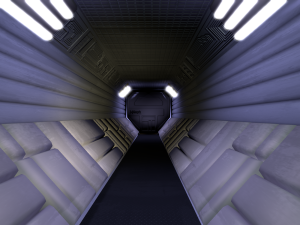
I’ve fleshed out the starting point of the experience at last. You begin in a docking tube extended from the USCSS Montero, a salvage ship, to an exterior airlock of the Conrad.

w1

First view into the Conrad

First view into the Conrad

I’ve also added a lot more detail to the airlock corridor – texture work to add a patina of dirt and a lot of extra normal map detail to stop the walls looking boring and flat.

w3

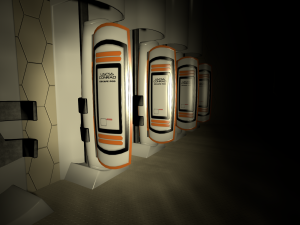
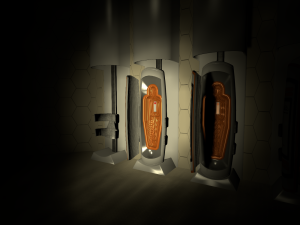
There’s also been a fair bit of work on props for the interior, the largest being an escape pod system:

Room for everyone

Room for everyone

Hmm...looks like someone may have got out

Hmm…looks like someone may have got out

Unfortunately as things go on it looks like I may have to abandon some of the things I’d planned for this build. I need to get it into an LI of less than 700 and I’m nearly hitting half that already without even really beginning on the lower deck yet. I’ll have to see what I can save with a bit of cunning linking here and there and maybe the odd rebuild of a prop or two.

I’ve had a fair bit of success in hitting my LI targets for the props – I’ve gone over a few times, but on the whole things have worked out about as well as I could expect.

There’s still experimental work going on and I’m still finding more efficient ways to get the effects I want.


Notes on lighting

As I’ve mentioned before a big part of the idea behind this build was to see how far I could push SL’s Advanced Lighting Model to get atmospheric effects. It’s a powerful system, despite a number of flaws and peculiarities, that I just haven’t seen used all that much around the grid. There’s not much call for it when you’re making clothing either 😉

I’m mostly making use of projector lights – if you haven’t tried them yourself or seen them elsewhere they act like a slide projector, shining an image into the scene.

For maximum effect they need to have something to project, of course. To get projection textures I’ve been making realistic physical copies of actual lights in Lightwave, creating models with emissive filaments, reflectors and lenses, then capturing their light as a baked texture. I’ve found that a lot of the time the best effects come from introducing some imperfections into the model – a misaligned filament, imperfect lens or smudged reflector.

These textures only need to be low-rez most of the time but the subtle texturing really seems to add something to the scene. It certainly introduces a lot of lovely soft edged shadows into the build, so I can’t complain.

I’m including a few of the textures I’ve been using in this post for you to have a play around with. I’m releasing these under a CC Attribution NonCommercial ShareAlike 4.0 International license at least until the Conrad build is complete. Have a play for now and wait for the free components I’ll be releasing when it’s all done.

Luminous tube cluster

Luminous tube cluster

Point filament torch with imperfect lens

Point filament torch with imperfect lens

Linear filament with faceted reflector and perfect lens

Linear filament with faceted hemispherical reflector and perfect lens

Linear filament off-centre in faceted hemispeherical reflector with imperfect lens

Linear filament off-centre in faceted hemispeherical reflector with imperfect lens


USCSS Conrad 7 : Computer interfaces

The Conrad is a bit more than just a backdrop build; there’s a story here that I want to tell. The general idea is that you can explore the Conrad, enjoy the ambiance and discover the fate of her crew through interacting with the environment.
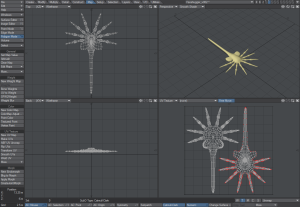
I’m sure anyone who has played any games in recent years is familiar with the idea of finding books, logs, or other information scattered about the world. Each game presents it in a different way. This is the mechanism that I’ve settled on for telling the story of the Conrad – SL doesn’t really give me a lot of choice there, but I guess if it’s good enough for Skyrim and Deus Ex it’s good enough for me!

The question is: How can I present it in SL in a way that both works to tell the story and doesn’t break the immersion in the scene?

I’ve tried several different options. The simplest for presenting some text to the user is for an object to give them a notecard, but that really seemed to take me out of the scene. “Hey, here’s a glaringly obvious SL mechanic!” Notecards are also very plain. I can embed pictures, but only as a clickable link. There’s no bold or italic and no control over the font at all. I definitely want richer text than notecards can offer.

Next I went down the route of using web media on a prim. On the face of it this was ideal, but this too came with some problems. First is that I know a lot of people either disable this feature entirely or set it not to auto-play. Sure, I could front-load the experience with instructions to turn this setting or that setting on, but I want to keep that to a minimum. The second problem is that you always get that floating media toolbar over it, something that again breaks the immersion.

What I’ve settled on so far is to use a prim, texture and script based system to present computer screens in the build with interactive elements:

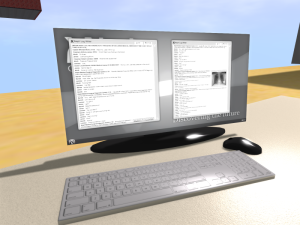
Conrad PC_001

The screen in the picture above has an LI of 4 and contains two interactive windows displaying transcripts of voice logs along with other data. The documents are images, so I can construct any degree of “richness” for them in Illustrator – there are limitations on resolution, of course, so there’s only so much I can get in there but it’s accommodated everything I’ve written so far well enough.

The windows themselves are interactive in that you can scroll up and down the documents they contain using either the up/down arrows on the scroll bar, the top/bottom buttons or by just clicking on the body of the document and dragging it up or down.

The scrolling is accomplished by using llDetectedTouchUV to track mouse clicks and drags and then llOffsetTexture to shift the content. There’s a little mathematical fiddling in the script to preserve the correct aspect ratio of the content no matter the shape of the window prim.

It’s not perfect but it checks a lot of boxes on my wishlist, particularly:

  • Rich text – no limitations; I can do anything I like in an image.
  • Immersive – no floating toolbars, no SL mechanics, no nothing; you just reach into the scene, touch things and the things react.

The downsides are that the size of the document is going to be limited by the maximum resolution of SL textures. There’s only so much information I can fit into that space but my experiments confirm that it should be sufficient.

I intend to use this technique in several places – there will be a combination of text sources, on desktop computers, PDAs and other devices scattered around the Conrad. The build is designed to lead you on a particular path through it but knowing what a contrary and awkward kind of person the average SL user is (but I love you all, really 😉 ) I’m trying to keep the narrative coherent enough that you can piece it together even if you totally ignore the sequence cues.


USCSS Conrad 6 : Facehuggers 101

My last post showed that one of the props I’ve built for the USCSS Conrad build was a Facehugger. I guess that means the cat’s out of the bag about the whole thing being an Alien tribute.

Making the Facehugger was a little out of my comfort zone but ended up being a lot less trouble than I expected for such a complex organic shape. In this post I’m going to run through the steps I took to create the mesh and textures. A lot of this is going to be specific to the tools I use, like Lightwave, but I’m going to talk in general terms as much as possible so that it’s applicable to whatever tools you’re using (hint: not Lightwave – I think I’m the only one left using it for SL!).

Building the Mesh
The Facehugger has a symmetrical structure; on each side there are four digitals (or “legs”, if you’re not a synthetic – I’m looking at you, Ash), a breathing sac and half of the tail. That gives us six things per side, so I began with a short twelve sided cylinder. I pulled the vertices at the back out to give it a more elliptical shape, and wider faces to serve as the roots of the breathing sacs.

The first four polygons on each side I extended out into the legs. At this point I’m just roughing things out so I just extended the edges using Lightwave’s bevel tool which allows you to extend out a polygon along its normal and scale the result at the same time. Three applications got me legs with two very basic knuckles on each.

I similarly beveled out the extended polys behind the legs to form the breathing sacs. Another bevel on the top rounded out the back of the creature a little.

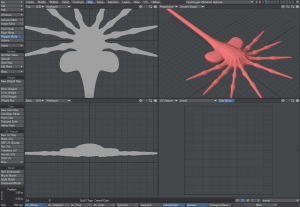
Mesh 01

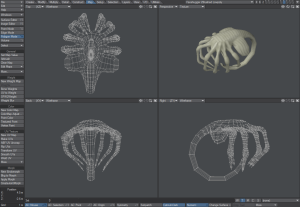
Now that I had the shape of the creature roughed out I started working with it as a subdivision surface. Hitting Tab in Lightwave toggles between mesh and subdiv, so I was switching back and forth, refining the mesh to create a more detailed subdiv surface.

I added more detail on the bottom of the creature, beveling it into a hollow then scaling the vertices inward and beveling again to create the hollow proboscis.

Mesh 02

This looked like it was going in the right direction so I extended the tail, finalising the overall shape of the thing.

Mesh 03


Next up it was time to refine the detail of the Facehugger. This involved a lot of switching in and out of subdiv mode, dragging vertices around and scratching my head while looking at reference material.

The biggest change was the rebuild of the legs. They needed to have knuckles rather than just be straight. Everything after the end of the first poly was amputated and rebuilt with boxy joints that would pull the subdiv surface out into the knuckles I needed. This left the base mesh looking a little lumpy,

Mesh 04

but it worked a treat for the subdiv surface.

Mesh 05

At this point I was happy enough with the basic shape of the subdiv surface so I froze it into a mesh (Ctrl+D, in case you were wondering how Lightwave rolls) and looked to the UV maps.

There’s just no good way to unwrap a mesh this convoluted. You can break the thing up into dozens of UV islands that make efficient use of the map space at the expense of making the thing practically impossible to work with. In the end I elected to split the mesh into top and bottom halves, unwrap each separately and then plonk them down next to each other. This ends up with a fair amount of dead unused space on the UV map but it’s a map you can work with in 2D painting packages quite easily. Everything’s swings and roundabouts.

Mesh 06

So, now things need more detail. Time to break out Zbrush!

I exported the UV mapped mesh as a Wavefront OBJ file (I know Lightwave has GoZ now, but it just doesn’t work in a useful way) and imported it into Zbrush as a new tool. There’s not a lot interesting to say about the Zbrush process – if you know Zbrush then you can imagine it all already. If you don’t, well, nothing I can say will make it clear.

I moved from mouse to the Wacom tablet and added detail to the model in Zbrush, ending up with a super-high poly model with ribbed flesh, extended knuckles and all kinds of lightly nauseating detail around the proboscis on the underside. I could probably have accomplished the same results in Sculptris but I was feeling crash-averse that day and opted for Zbrush.

Mesh 07

Texturing
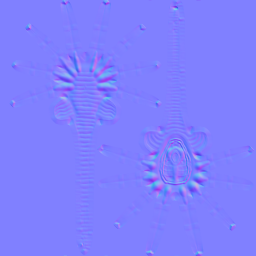
I exported the high poly model from Zbrush and used that with the original mesh to create a normal map in xNormal. Both models were in Wavefront OBJ format which xNormal likes well enough. A little fiddling with the settings got me a clean normal map.

Texture 00


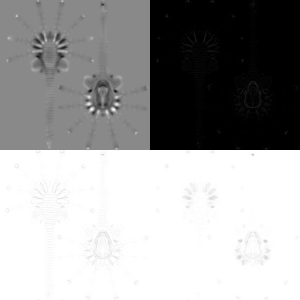
I fed this normal map to Knald and it obligingly generated me height, concavity, convexity and ambient occlusion maps from it.

Texture 01

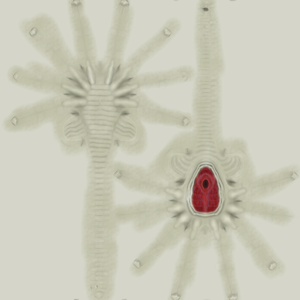
There’s a lot of useful information in these different maps – layering them together in a 2D package like GIMP with different blend modes can create some interesting effects. I played with this for a while until I got something I was happy with, then painted in more detail like the red, fleshy underside around the proboscis. This comprised several layers: colour, highlights, blue veins, red veins, more highlights. I added some more colour with a textured brush over the top of everything to produce a diffuse map for the model that, I think, worked pretty well. I wasn’t too precise with things since a little randomness enhances the overall organic feel of the model, I think.
Texture 02

I also used a similar process to create a specular map that gave some low shine over the creature’s body and a slippery gloss around the fleshy underside.

The final stage was to use Lightwave to arrange the low poly model in several different poses as required for the overall build – curled up and dead, flat out and dead (and more, perhaps not so dead 😉 ).

xFinal01


Uploaded to SL this looks just as good as I’d hoped when I began the build. The land impact is relatively high at seven, but with a shape this complex I was never going to get away with much less while preserving the silhouette – the Conrad build has a heavy emphasis on lighting and shadows so the silhouette of the model was quite important to me.